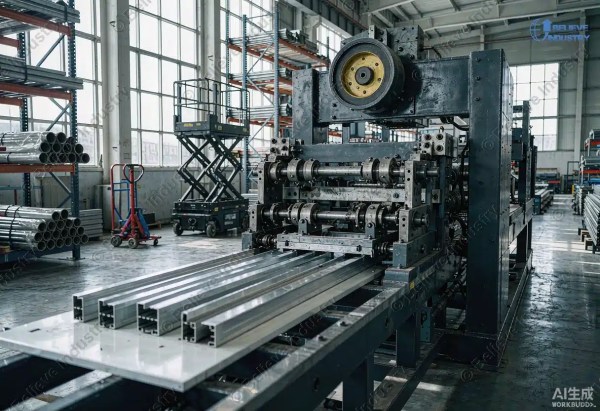










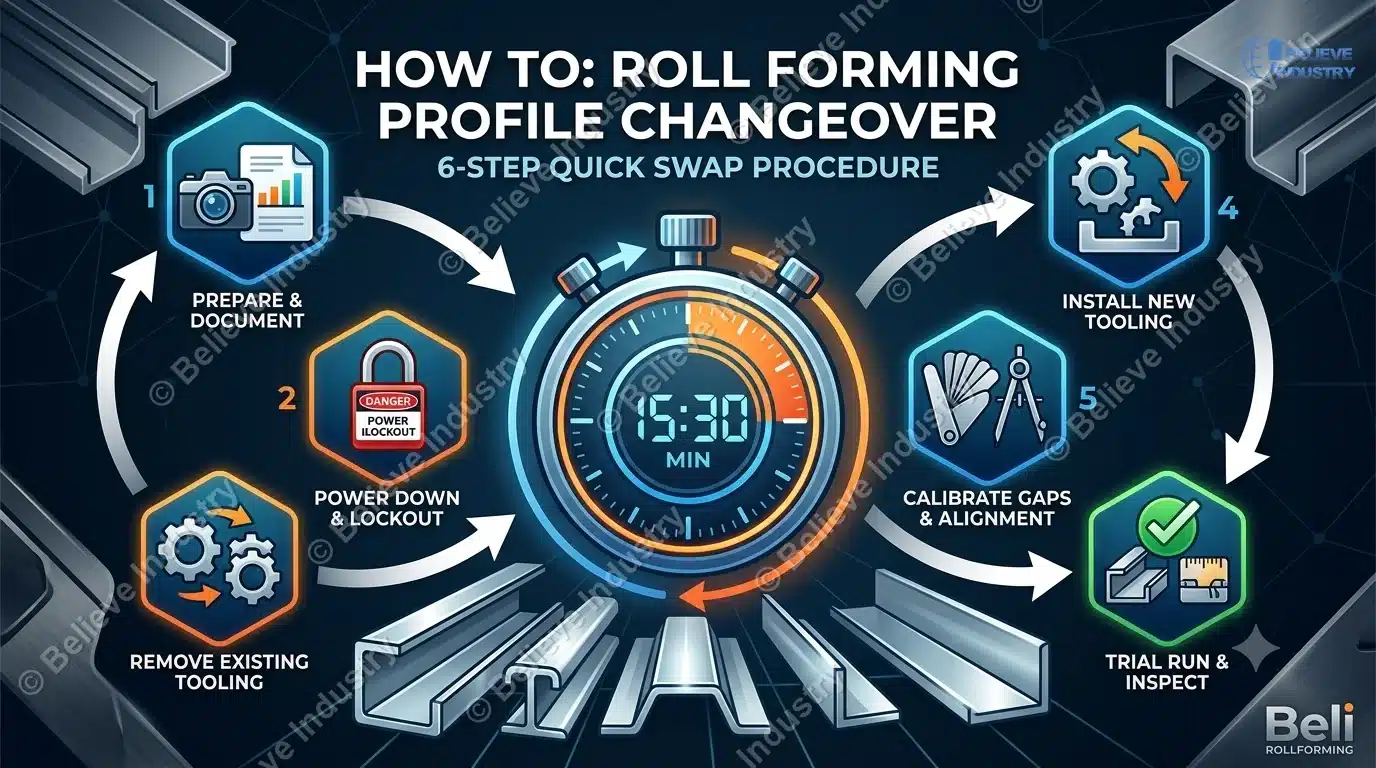
Switching from one profile to another on a roll forming line does not need to eat up half your shift. A well-planned roll forming profile changeover can take as little as 15 to 30 minutes when you follow a disciplined quick swap procedure. The key is preparation, the right tooling design, and a repeatable sequence that every operator follows the same way every time.
Whether you run a quick change roll forming machine or a traditional fixed-stand line, the steps below will help you cut downtime and protect your rollers. This guide breaks the roll forming profile changeover into six clear
Why Roll Forming Profile Changeover Efficiency Matters
Every minute your line sits idle during a roll forming profile changeover is a minute of lost production. On a high-speed line running at 30 meters per minute, a two-hour changeover costs you 3,600 meters of output. That is real money walking out the door.
Shops that invest in cassette type roll forming machines can slash changeover times from hours to minutes. A cassette system is a modular tooling design where the entire set of rollers is mounted in a single removable frame (cassette) that slides onto the mill base as one unit, instead of removing individual roller stands one by one. But even on standard lines, a disciplined quick swap procedure makes a massive difference.
The Occupational Safety and Health Administration (OSHA) requires lockout/tagout procedures under standard 29 CFR 1910.147 during all machine servicing, including profile changeovers. A proper profile changeover protects both your workers and your tooling investment. Beli Rollforming has spent over 15 years building roll forming lines for customers across 20+ countries, and we design every machine with changeover efficiency in mind.
Step 1: Prepare and Document the Current Setup
Before you touch anything, document the current line configuration. Write down the material specs, coil width, profile drawing number, and roller stand positions. Take photos of the roll forming tooling arrangement from multiple angles. This documentation saves huge time when you need to switch back to this profile later.
Gather all tools, wrenches, torque keys, and the new tooling set before starting. Check that the new rollers are clean, inspected, and ready to install. Review the flower pattern drawing for the new profile. A flower pattern is a sequential cross-section diagram showing how the flat strip progressively bends into the final profile shape across each roller stand, so you understand the forming sequence.
Create a changeover checklist specific to your line. Include every bolt, guide, and sensor that needs adjustment. A standardized checklist is the foundation of a repeatable roll forming profile changeover. According to The Fabricator, shops with documented changeover procedures cut their setup times by 40 to 60 percent compared to shops that improvise.
Step 2: Power Down and Lockout/Tagout
Safety comes first in any roll forming profile changeover. Shut down the main power and engage the lockout/tagout (LOTO) system. No operator should begin the tooling swap until the electrical, hydraulic, and pneumatic energy sources are fully isolated.
Verify zero energy state by attempting to start the machine at the control panel. Release all hydraulic pressure from the system. Block any elevated components that could fall during the changeover. This step is not optional. Even a quick swap procedure on a cassette type roll forming machine requires full LOTO compliance.
Notify all personnel on the production floor that the line is locked out. Post warning tags at every energy isolation point. Only the operator who applied the lock should remove it after the profile changeover is complete.
Step 3: Remove Existing Tooling and Roller Stands
With the line locked out, begin removing the current roller set. Start from the exit end and work backward toward the entry. This prevents damage to partially loosened stands as you remove upstream components.
Loosen the clamping bolts on each roller stand. Lift the upper shaft assemblies carefully using proper lifting equipment. Label each roller set with the profile name and stand number before storing them on designated racks. A clean, organized tooling library makes the next roll forming profile changeover much faster.
Remove the entry guide rollers and any servo feeder tooling that is profile-specific. Clean the mill bases thoroughly with solvent and wipe dry. Inspect the shafts and bearing surfaces for wear or scoring. If you find damage, address it now rather than during the next production run.
Step 4: Install the New Profile Tooling Set
Install the new rollers starting from the entry stand and working toward the exit. Follow the flower pattern drawing exactly. Each stand forms a specific bend angle, and installing them out of order will produce a defective profile.
Torque all clamping bolts to the manufacturer’s specified values. Use a calibrated torque wrench, not a standard wrench. On a quick swap procedure using cassettes, slide the entire cassette module onto the mill base and lock it into position. This is where roll forming mills designed for quick-change systems show their value.
Set the entry guide width to match the new coil width. Install any profile-specific cutting dies in the fly cutoff or stopping shear. Adjust the roll forming inspection stations to match the new profile dimensions. Every component must be in place before you restore power.
Step 5: Calibrate Roller Gaps and Entry Guide Alignment
This is the most technical step in the roll forming profile changeover. Set the roller gap for each stand according to the setup sheet. The gap must match the material thickness precisely. Too tight and you will mark the material. Too loose and the profile will wander.
Use feeler gauges to verify gaps at both the drive side and operator side of each stand. Any taper across the roller face will cause camber or twist in the finished profile. Check entry guide alignment with a straightedge stretched from the uncoiler through the first three stands.
For high-strength steel profiles, account for springback in roll forming by slightly over-bending at the final stands. Refer to the profile drawing for the compensation values. Record all gap settings on the setup sheet for future reference. This calibration data becomes your baseline for the next profile changeover.
Step 6: Trial Run, Inspect, and Validate
Remove the lockout and restore power. Thread a short test coil through the line at reduced speed, typically 5 to 8 meters per minute. Watch the strip as it enters each stand. Look for material wandering, edge waviness, or marking.
Cut the first trial piece and measure every critical dimension. Compare against the American Society for Testing and Materials (ASTM) A653/A653M tolerances or your customer’s drawing. Check leg lengths, web width, bend angles, and overall straightness. If dimensions are off, make small adjustments to the relevant stands and run another trial piece.
Repeat this cycle until the profile meets specification consistently across three consecutive pieces. Then ramp the line up to production speed and verify quality again. Only after full-speed validation should you begin production runs. A proper roll forming profile changeover ends with confirmed quality, not just installed tooling.

Traditional vs Quick Swap Changeover Comparison
The difference between a traditional changeover and a quick swap procedure is dramatic. The table below shows how cassette type roll forming machines and standard lines compare across key metrics.
| Metric | Traditional Changeover | Quick Swap (Cassette) |
|---|---|---|
| Average time | 2 to 4 hours | 15 to 30 minutes |
| Labor required | 2 to 3 operators | 1 to 2 operators |
| Tooling damage risk | High (individual stand handling) | Low (cassette protects rollers) |
| Calibration needed | Full re-shimming per stand | Pre-set gaps in cassette |
| Training complexity | High | Moderate |
| Initial machine cost | Lower | 20 to 35 percent higher |
A double layer machine offers another alternative. It runs two different profiles on the same frame without any changeover at all, but at a lower speed per profile.
The table below shows typical changeover times by machine type and profile complexity.
| Machine Type | Simple Profile | Complex Profile | Operators Needed |
|---|---|---|---|
| Traditional fixed stand | 90 to 120 min | 180 to 240 min | 2 to 3 |
| Cassette type | 15 to 20 min | 25 to 35 min | 1 to 2 |
| Double layer | 0 min (no swap) | 0 min (no swap) | 0 |
| Duplex (side-by-side) | 5 to 10 min | 10 to 20 min | 1 |
Common Profile Changeover Mistakes to Avoid
Even experienced operators make mistakes during a roll forming profile changeover. The most common error is skipping the documentation step. Without photos and recorded settings, returning to a previous profile becomes a guessing game.
Another frequent mistake is over-tightening or under-tightening clamping bolts. Always use a torque wrench set to the manufacturer’s specification. Guessing torque by feel leads to roller misalignment and premature bearing wear.
Never skip the trial run. Some operators trust their calibration and go straight to production speed. This risks producing hundreds of meters of scrap before anyone notices a dimension is off. A proper quick swap procedure always includes a slow-speed trial and dimensional inspection.
Finally, do not neglect roll forming preventative maintenance during changeovers. Each swap is an opportunity to inspect shafts, bearings, and drive components. Catching wear early prevents unplanned breakdowns later.
Frequently Asked Questions
A roll forming profile changeover takes 2 to 4 hours on a traditional line. With a cassette type machine and a proper quick swap procedure, it can be completed in 15 to 30 minutes.
On a cassette type line, one trained operator can handle the profile changeover with proper lifting equipment. On traditional lines, two to three operators are typically needed to remove and install individual roller stands safely.
A quick swap procedure is a standardized sequence of steps for changing tooling sets rapidly. It involves pre-documenting settings, using cassette systems, and following a strict calibration and trial run protocol to minimize downtime.
Yes. You need calibrated torque wrenches, feeler gauges, lifting straps, and cleaning supplies. Some lines also require specialized stand-pulling tools provided by the machine manufacturer.
Inspect rollers at every profile changeover. Look for surface wear, chipping, and bearing play. Early detection of roller damage prevents profile defects and extends tooling life significantly.
Lockout tagout (LOTO) is a safety procedure that isolates all energy sources before maintenance. OSHA requires it during any roll forming profile changeover to prevent accidental machine startup that could injure operators.
No, each profile requires a specific strip width calculated from the profile cross-section. Using the wrong coil width will produce incorrect dimensions and potential material waste. Always verify the required coil width on the profile drawing before loading material.
Cassette systems hold the entire roller set in a single removable module. Operators swap the whole cassette instead of removing individual stands, which is why the quick swap procedure is so much faster.
Incorrect gaps cause marking, material wandering, twist, and camber. The profile will fail dimensional inspection. Always use feeler gauges and verify gaps at both drive and operator sides during the profile changeover.
Apply light lubrication to shaft surfaces before installing rollers. Avoid over-lubricating, which attracts dirt and contaminates the material surface. Follow the manufacturer’s lubrication schedule for your specific roll forming line.
Conclusion
A disciplined roll forming profile changeover is the difference between a profitable line and one that bleeds downtime. By following these six steps, you can turn a multi-hour ordeal into a 30-minute routine. Document your setup, follow LOTO protocols, install tooling carefully, calibrate precisely, and always run a trial before full production.
Whether you operate a standard line or a cassette type machine, the quick swap procedure scales to your equipment. Beli Rollforming builds lines designed for fast, safe changeovers, backed by over 15 years of engineering experience serving 20+ countries. Contact us to learn how our quick change roll forming machines can dramatically improve your production efficiency.
Article Changelog
- 2026-08-10: Initial publication. Covers 6-step quick swap procedure for roll forming profile changeover with comparison tables, FAQs, and safety protocols.
- 2026-08-10: GEO compliance update. Added entity definitions (OSHA, ASTM, cassette system, flower pattern), OSHA 29 CFR 1910.147 citation in body text, fixed FAQ first-sentence answers for AI citation, added definition blocks for key terms.
Next Review Triggers
- New cassette type machine models released with different changeover specs
- Updates to OSHA lockout/tagout regulations (29 CFR 1910.147)
- New ASTM tolerance standards for roll formed profiles
- Customer feedback on changeover time benchmarks
- Addition of automated changeover systems to Beli product line